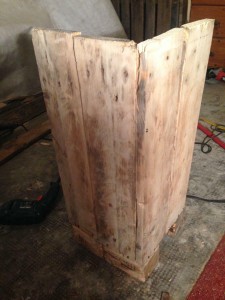
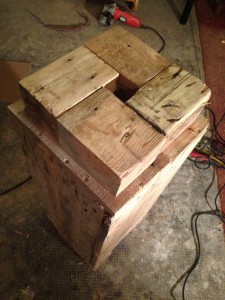
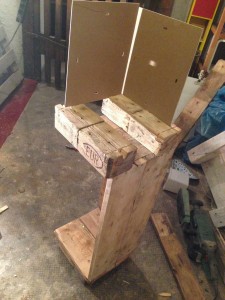
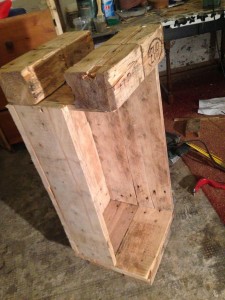
Quantcast
Channel: Pallet Furniture – Pallet Furniture

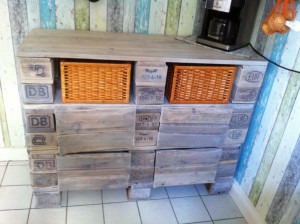
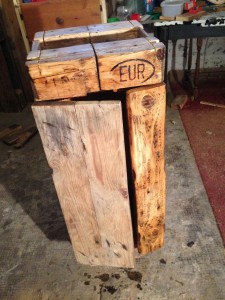
Euro pallet kitchen cabinet – small cupboard, pallet version

0
0
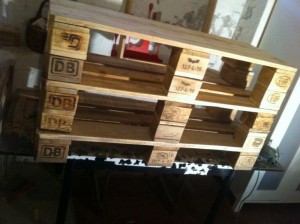
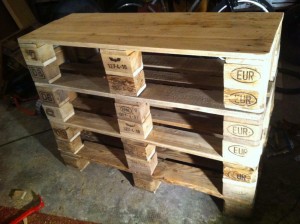
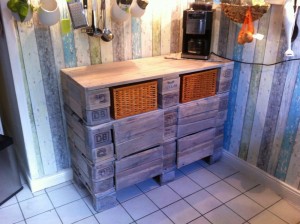
Euro pallet kitchen cabinet. After three days of processing.

Euro pallet kitchen cabinet. After three days of processing.

In many respects a first. I wasn’t too keen on creating cabinets before, the material and the expected results seemed “too clunky”, somehow inappropriate to me, and given the restrictions of the material, pallet cupboards just werent’t really obvious to me. Now, a cabinet. Furthermore: i guess in all of my posts, sooner or later I talk about how much I prefer one way pallets to Euro pallets – lighter, usually cleaner, simple and easy to work with and most of the time the more “light”, less clunky results. Now a break with these two habits: a cupboard, made from Euro pallets.

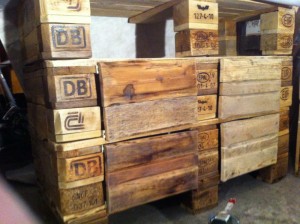
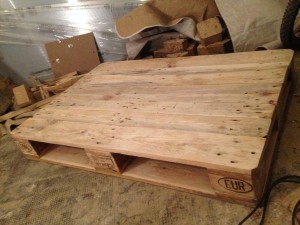
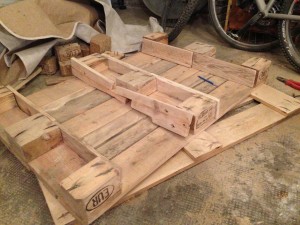
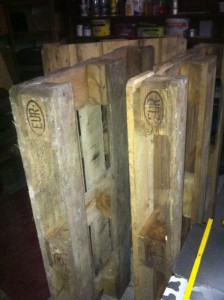
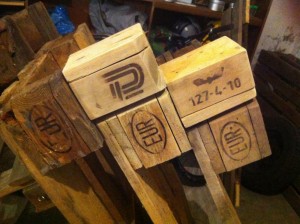
Euro pallets, raw material in medium condition

Euro pallets, raw material in medium condition

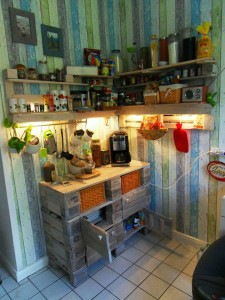
The latter has a background. After moving into the new apartment in Wuppertal it turned out that in the basement still some old Euro pallets were deposited (see also: Where to get pallets?). Precisely, four Euros and two indefinable age-old Disposeables. Owner said he’d dispose them, we said no, he can leave them here, we’ll think of something. This thinking lasted a bit, but here we are. A kitchen cupboard. You can put the coffee atop, you can puit some stuff in, it looks fine and fits perfectly to the pallet kitchen shelf, obviously.

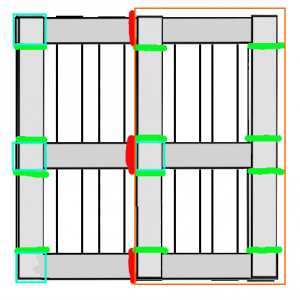
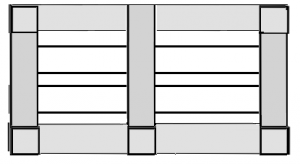
Pallet processing for DIY kitchen cabinet, Scheme

Pallet processing for DIY kitchen cabinet, Scheme

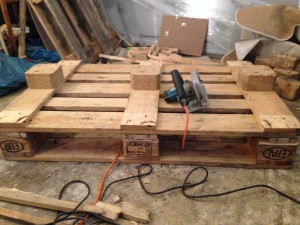
Principle: One pallet, one floor of storage. More precisely, two-thirds of a pallet in double heigth, anything else would be somehow oversized. Thick red line in the diagram: here the entire part was sawed off. The rest was used nearly as a whole, (thin orange border section). Along the green lines the “Footer Boards” were sawn out between the “spacers”. The turquoise edged spacers (4) were levered out later with the crowbar (Yeah! Crowbar!), we well need those later, so they shouldn’t break. That is pretty easy twith “natural wood” spacers, but those from pressboard are sometimes a pain in the butt.

The idea behind: each cupboard floor is “double spacer heigth”. Therefore, we’ll need five spacers per floor (and have only four per pallet plus), but since we need an additional pallet for the footer construction of the cupboard, we even have a reserve of one or two in case if one crumbles while levering off. The plan here is to build the cupboard three compartments high, so I need a total of four pallets.

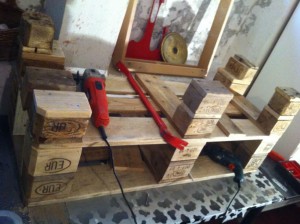
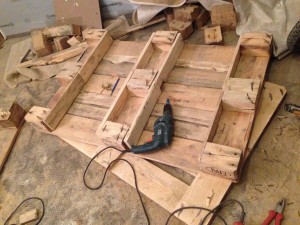
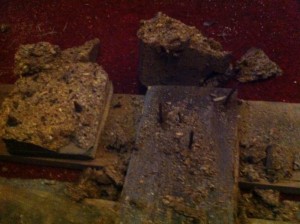
Crowbar action, done wrong

Crowbar action, done wrong

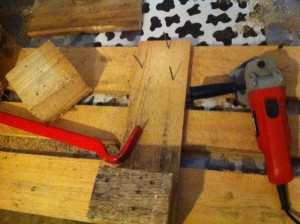
Crowbar action, done right

Crowbar action, done right

My advice: use the cut-off-saw for protruding nails which aren’t removed otherwise, and use it soon. It depends on your workplace, but you can get ugly injuries with those old nails. Never happened here, but i want it to stay so.

Scheme: processed/sawed pallet, ready as a kitchen cabinet rack level

Scheme: processed/sawed pallet, ready as a kitchen cabinet rack level

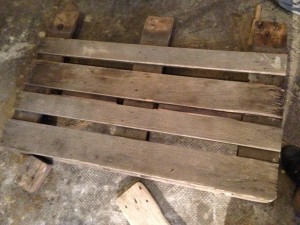
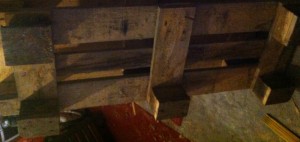
Processed pallet, similar to the scheme

Processed pallet, similar to the scheme

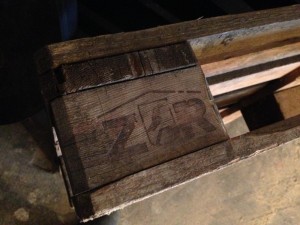
Pallet brand, after first grinding

Pallet brand, after first grinding

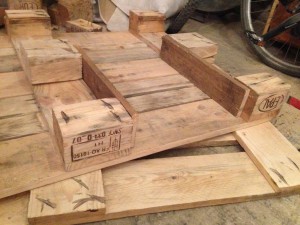
Cut out the offcuts of the footer boards clean and straight, and keep the offcuts – we’ll need it later, especially the pieces from between the spacers. Those specific specimen looked pretty bad, but once again it was quite interesting to see what came out behind the dirt and the rugged surface. As always: Grind everything – the dirt has to be off, the surface should be smooth, and when you’re lucky, you’ll discover some beautiful grains. Last not least, the rougher your surface, the more paint/varnish/whatever it’ll consume later.

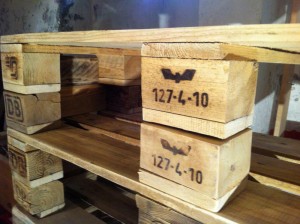
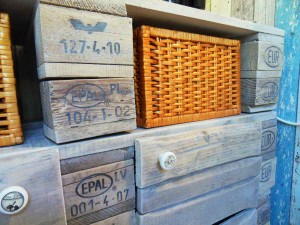
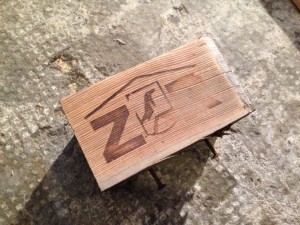
Footnote here: The nicest feature of the euro pallet is definitely the brand sign stuff on the spacer parts. After the first grinding work i was really impressed. There are many (here, we have the railroad companies of germany and france, Deutsche Bahn and SNCF and some business i do not know). Arrange as preferred.

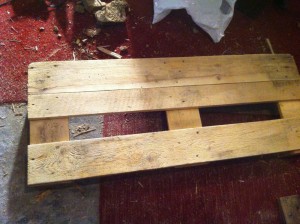
Worktop pallet cabinet 1: move one board

Worktop pallet cabinet 1: move one board

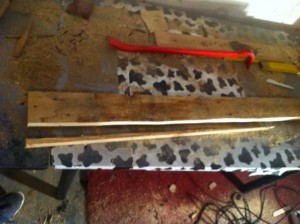
Worktop pallet cabinet 2: Cut spare board

Worktop pallet cabinet 2: Cut spare board

Worktop pallet cupboard 3: Inserting the spare board

Worktop pallet cupboard 3: Inserting the spare board

But first, we’ll have to start from the top of the cupboard. The cabinet is supposed to have a work surface. We have to – obviously with the best available pallet – remove one of the top boards, place it end-to-end to one of the remaining boards and install an additional one (you should have two surplus boards from the rest of the top pallet) to have a closed surface. You’ll need to cut this additional board into shape.

Now things started to become a bit more complicated. I want *two* spacers stacked for one “cupboard floor”, so that the cabinet compartments are sufficiently high. Also I do not not want to screw everything together somehow with fittings. Plus, i noticed after finishing the first sample cabinet compartment that things are getting somehow heavy.

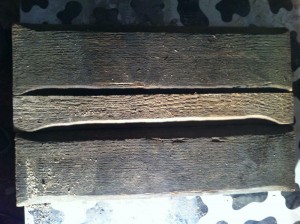
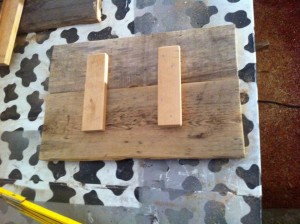
To kill two birds with one stone: a sort of wooden “plug-in/stacking method” for the various compartments. Next: we also need some side panels. Obviously made with wooden boards (we have some of those), which in turn must be fixed somehow. Last ot least: to fix the additional spacers to each other and to the next pallet cabinet element, one would need *very* long screws, what i’d like to avoid. All in one-solution: you take a piece opf cutoff wood, grind it and cut it the long way through.

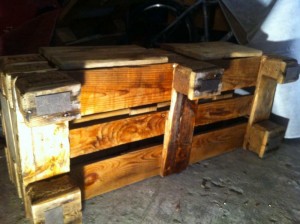
Pallet cabinet - two of three elements stacked

Pallet cabinet – two of three elements stacked

Side panel, preliminary

Side panel, preliminary

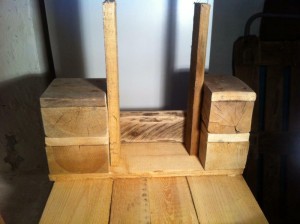
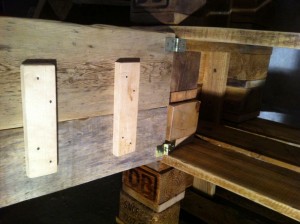
The logs are screwed against the fixed spacer. Second spacer to the log, side panels to the log, too (place them respectively). Here, I’ll need side panels at one side onmly, for the other side goes to the wall. The “connector log” protrudes about one board heigth.

Connector for cabinet base

Connector for cabinet base

Connector: still too long

Connector: still too long

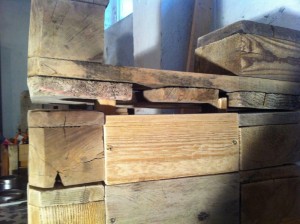
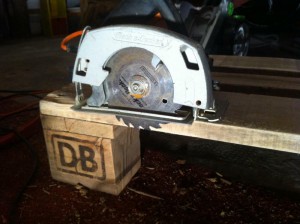
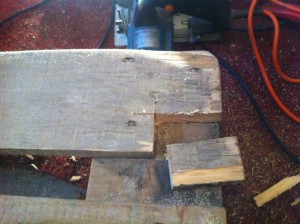
This fits exactly at the rear side of the next pallet element (former “middle part”), because thats at the “standard boards and gaps positions” of the pallets. On the front page it doesnt’t: we’ll have to adjust it. Premiere: Buzzsaw Action! I found this one a few months ago at the flea market, took it “just in case” , and was now quite happy about it, because you can just “sink in” with the saw through the most upper layer of board. Cut out the gap where the “connector log” needs to fit in.

Buzzsaw Action!

Buzzsaw Action!

Buzzsaw Action!, result

Buzzsaw Action!, result

Repeat for all the compartments. On the lowest, the “footer pallet” is screwed simply beyond. The double spacer element in the middle of the front of each cupboard element is fixed with metal fittings (not avoidable here). Since the stability comes later through the stacking and the weight, it just needs to “stay there” ATM.

Connector: fits now.

Connector: fits now.

Next element

Next element

And, small digression: the whole thing becomes – thanks to pallet standards – straight and stable. Nevertheless, you have the usual variances, a few millimeters more or less here and there. If your ambition is to have everything really perfect, straight and fitting exactly, you have a lot more work. Most of the time i trust that it fits by and large and the “flair” of the pallet stuff is (imo), that its not as precise and exact as standard furniture. If one element sits wobbly on another, felt pads between the elements/at the stacking points do help. But still, the starting material is an “inexact science”, if you want to do exactly, it could get tiring.

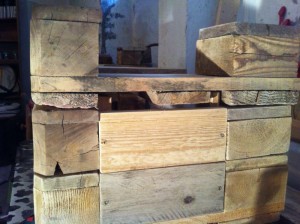
Pallet cabinet, shell, unvarnished

Pallet cabinet, shell, unvarnished

At this point, I started varnishing. With a wax water-based glaze (amazed me that this combination exists). Reason one: it was Sunday and i wanted to continue with some work which doesn’t make too much noise. More technical reason: from this point on, things are assembled, and the more assembled your stuff is, the more difficult it becomes to varnish comfortably.

Varnishing is always a bit of a grab bag. I had nice clean wooden surfaces, which turned out quite rocked after varnishing, others that looked mostly boring and suddenly became beautifully textured, you often don’t really know in advance. As an outlook: later i had some transparent white varnish overall – finished and in place, it looked slightly too dark to us. Matter of taste. Depending on the condition of the pallets, it is generally not a bad idea to varnish twice.

A cupboard door, unprocessed

A cupboard door, unprocessed

A cupboard door after some work

A cupboard door after some work

Doors. I was quite uncomfortable about making those, since doors should be somehow precise etc., while pallets aren’t. The finished cupboard doors were of course skew, nevertheless, it feels “consistent” – nothing is really precise here, so it adds to the character. Well, mater of taste, i guess. I also had the ambition to use the cuterly, and since the cut-out pieces of wood from the “footer boards” fit excactly into the door gaps, it was a quite obvious plan. Depending on the width of the boards, you’ll need either two or three or two and a half :) – the length again should fit, nevertheless, you’ll have to adjust every other board a bit.

First door mounted

First door mounted

All doors mounted. To the right: not yet varnished

All doors mounted. To the right: not yet varnished

Hinges: more or less the cheapest stuff from the hardware store – they should do the job. In retrospect, i’m glad: wider hinges would have been more difficult to process, because depending on the positioning, i would have had to attach them to the narrow “board layers” of the pallet frame. Broader hinges would have caused problems here. Neverthelöess, feel free to try a more sophisticated/precise way of doors and door fixations – i’d be curious to see it.There are most certainly more “professional” door solutions here. Besides: yiou can imagine that i had some grinding work here again.

Assemble, varnish the doors, and now for the last details. On the rear side, I attached two fittings per cupboard segment (see the picture), because i thought i should attach the “cupboard stacks” in the end. After it was built up, I didn’t – it simply wasn’t necessary, for everything was tsble in itzself. Nothing wobbles, everything fits, so i kept it “modular”.

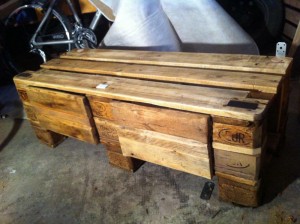
Small pallet cabinet: Would do as a small cupboard on itself

Small pallet cabinet: Would do as a small cupboard on itself

Felt pad fetish FTW!

Felt pad fetish FTW!

First final version: found too dark

First final version: found too dark

Dissected again. I attached felt pads between every element and to the cupboard feet. Here i noticed that the “three compartment” version does nicely, but one or two elements high also look nice. Maybe another project.

Now on to the final assembly. All three parts off to the kitchen. After the final stacking we found them still a bit too dark. Again, matter of taste (and how it fits to the rest of the interior).

Here, i just grabbed the leftover chalk white/transparent varnish i had from a different project and did another paint job. Afterwards, it was totally OK to me.

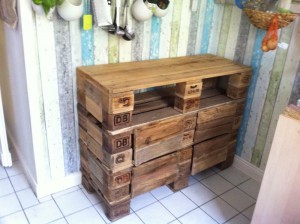
Kitchen cabinet, front, final

Kitchen cabinet front, final

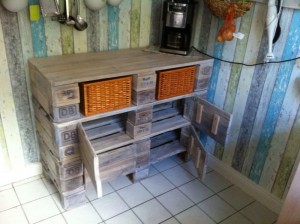
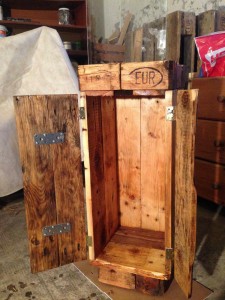
Kitchen pallet cabinet, doors open, final

Kitchen pallet cabinet, doors open, final

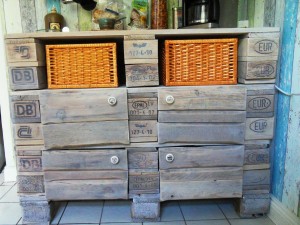
Pallet cabinet with doorknobs

Pallet cabinet with doorknobs

Odds and ends: maybe the doors get magnets to close. Doorknobs were on the way on time of writing.

Time needed: one long weekend, but without too much work. If you have better pallets to begin with, it should be feasible in two days. Costs: can’t really be estimated on that one, about 30 Euro (ca. 50 Dollars) for hinges, varnish and felt pads, but i had already enough/needed tools, nails, screws and stuff.

Addendum: Door knobs arrived!

Pallet cabinet with doorknobs, Detail

Pallet cabinet with doorknobs, Detail

Pallet cabinet  and kitchen shelf, with lights

Pallet cabinet and kitchen shelf, with lights

The post Euro pallet kitchen cabinet – small cupboard, pallet version appeared first on Pallet Furniture.

Flower stands, small garden furniture: Pallet leftovers

0
0
Three flower stands made from Pallet leftovers

Three flower stands made from Pallet leftovers

Preliminary notice: i wouldn’t recommend those projects as standalone. Not because the outcomes aren’t pretty, but effort/result may be quesitionable then. My main reasons for building these were

  • I wanted to experiment with Tripods and oblique elements and
  • i had a lot of leftovers from the kitchen cabinet.

Didn’t want to throw this stuff all away, so i tried some flower stands, one of them useable as a small side table, too.

It all started with the idea to make a tripod, because we have a stool permanently occupied by a palm tree, which we liked to use otherwise. One very faded pallet of quite indefinable kind was also left over, also were a lot more remains of the only partially used euro pallets from the kitchen cabinet. Idea: use the three “base elements” as legs of the tripod, just to have this “pallet-like” structure. Furthermore: cutting the upper parts to unify obliquely at the top that they fit together and can be fixed this way. Came out to be a bad idea, but i had some learnings.

Idea: flower stand, high and three-legged

Idea: flower stand, high and three-legged

Tripod legs, sawn pallet elements

Tripod legs, sawn pallet elements

Idea

Oh well. I saw some pallet furniture projects looking terrible at the beginning and even in the middle of assembly, coming out fine in the end, so hey, relax. Nevertheless, my significant other considered the draft as too high and otherwise kinda ugly. I disliked the chunky “spacer bits” and did generally not like it, so I thought i should cut them down a bit, it won’t be an error. And who knows, maybe it inspires.

Low tripod: small pallet plant stand

It did. Cutted off tghe footer parts halfway between end and middle spacer and suddenly i had three pieces of pallet cuterly badly demanding to become a small tripod. They just needed some cutting into form.

Sawed-off pallet ends, trimmed

Sawed-off pallet ends, trimmed

Sawed-off pallet ends, assembled

Sawed-off pallet ends, assembled

Looks OK already. Grinding and screw from the bottom with fittings.

Small pallet plant stand, bottom

Small pallet plant stand, bottom

Small pallet plant stand, top

Small pallet plant stand, top

The principle works, its a bit of bricolage and I suspect that it won’t work stable in larger structures, but in this size, I found it quite charming.

Pallet plant stand, tripod, shell, second attempt

But what now about the rest? OK, forget the thing with the “crooked tripod legs”, take some pallet boards, fit them as a square plate to screw onto the tripod, grind everything and place it onto its legs.

Now the central “spacers” became interesting – until now, they were a bit of an annoyance I just kept for the “pallet style”.

…hmmm…. An intermediate floor! Cut boards to size, grind and fix them!

Pallet table, tripod, painted

Pallet table, tripod, painted

Flower stand, tripod, with shelf sawn to form

Flower stand, tripod, with shelf sawn to form

Higher tripod: Pallet side table

Higher tripod: Pallet side table

Suddenly everything becomes stable and looks as if i had a plan on from the start. With this result I was also quite pleased.

Bits and pieces yet – the inevitable felt pad bottom-glides, paint/varnish (I used up my residual water/wax stain from the kitchen cabinet up to the last drip) and the result also does its job as a sofa side table.

Medium sized stool: flower stand from residual pallet boards, medieval version

Now i still had a number of pallet board leftovers, and a small and large flower stand makes a medium sized one somehow mandatory. “Base elements” were out, so we only have standard boards. Means: you can also make this one from simple wood boards.

Mark foot sections for the stool crosswise

Mark foot sections for the stool crosswise

Surface, sawed boards and cutted-off nails

Surface, sawed boards and cutted-off nails

Residual pallet material. Vulgo: boards.

Residual pallet material. Vulgo: boards.

…I guess i had these medieval market plug-in deck chairs in the back of my head. But as a flower stand, the item didn’t need to become this very sound and stable. Cut both boards straight halfway through, in a diagonal saw angle.

Both jigsaws I use can be adjusted the way shown here, i guess its kind of a standard. I think five degrees more or less don’t matter, but be warned, i needed some stabilizing screrwing adfterwards and am not as happy with this one vompared to the other two flower stands in poinmts of stability.

Stool, mostly assembled and with stabilized footer elements

Stool, mostly assembled and with stabilized footer elements

Jigsaw, ankled use

Jigsaw, ankled use

As you can see: i just used some leftovers pieces of wood, screwed directly through the edges, nothing wobbles.

TZhe whole stool would be stable enough for some flower pots without these, too, but hey, it’s a small piece of furniture not to be dissected again, so have it stable.

As always: sanding before, painting/varnishing after final assembly.

Wooden stool, felt pad assembly

Wooden stool, felt pad assembly

Medium stand for flowers, water/wax varnished

Medium stand for flowers, water/wax varnished

After final assembly: some details grinded

After final assembly: some details grinded

…oh well. What has three legs stands stable, what has four (or something square-formed as this board angle stuff here, must be clean straight, or it wobbles.

I must admit, after some afterwork i called it a day and said, good enough for me.

Final installation: high pallet plant stand

Final installation: high pallet plant stand

Trilogy of pallet flower stands

Trilogy of pallet flower stands

Conclusion

Once again, no clear costs/material information – you don’t buy stuff extra for small projects like these, you realize them because you have the leftovers from the other projects. More the “do i really have to throw away all that stuff?” and then don’t – build something instead :)

The post Flower stands, small garden furniture: Pallet leftovers appeared first on Pallet Furniture.
Side cabinet, wind light from pallets, photo frame glass

0
0
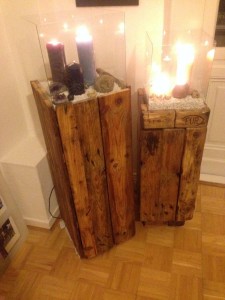
Pallet side cabinet, linseed oil, with photo frame glass panes

Pallet side cabinet, linseed oil, with photo frame glass panes

Sauna is a wonderful thing. It disrupts deep relaxation though, when you see there large beautiful wooden side cabinet lanterns and get the thought “Oh, can we build something like that?”. Since we were in the sauna, i had no chance of taking a picture of my template/inspiration, but the result should be approximately 90 cm in height, about 30 × 30 cm wide/deep and resulting in an intermediate of lantern and side cabinet. Glass protecting the candles atop, oiled wood cabinet below and of course a place to store candles in inside.

We’ll need (nearly) two pallets, mainly for the need of long (90cm+) boards. From one single pallet you don’t get enough 90 cm boards for the side panels / doors, and moreover, the leftovers are to schort for the also needed 30 cm-parts for intermediate floors and framing. Particularly nasty: the “standard blends” that you get when sawing at the spacers, are always about 22-26cm in length, whats really annoying if you noticing after cutting these – you get longer parts after dissecting the pallet parts completely. Learning curve.

Pallet, middle foot removed

Pallet, middle foot removed

After this one, i’ll definitely try another construction method. I think here I worked in a kinda wrong direction from the beginning. So check out the “aqlternate version, too. (Update: second version here!) The Plan for next time:

  • · Cut four pallet spacers with the jigsaw as glass holders, place glass plates in the cuts for solid/straight placement
  • · use these four pallet spacers as the form factor for the wind light, build the panels around these and
  • · not vice versa – because it is quite a matter of luck that everything fits reasonably.

Alike other projects: remove the mid-foot, remove nails (here more for safety reasons) right afterwards, here, we’ll need the right and left sections, not the middle part later. The leftovers can be used later for patches in the side panels. Remaining: two pallet parts off with one pallet foot each. The footboards later serve as supports for the shelves. Width is just over 30 cm – relevant here the inner width, because I want to place four glass plates. The cheap solution are frameless clip photo frames: Standard DIN A 3, 29.7 to 42 cm. We have a little gap on the edge, but we also know that pallets are not an exact science.

Halved pallet for windlight cabinet

Halved pallet for windlight cabinet

Lantern/side cabinet pallet, completely dismantled

Lantern/side cabinet pallet, completely dismantled

The tasks now:

  • · Shorten board to 90 cm.
  • · remove the footer board
  • · remove the middle board, since we want the boards being completely closed/next to each other. INsert the removed board without spacing, measure the width of the gap, cut an additional board of appropriate width, fix it.

Lantern/Pallet cabinet, walls on two sides

Lantern/Pallet cabinet, walls on two sides

Cabinet side panel, fully enclosed,

Cabinet side panel, fully enclosed,

In which order? I’ve been shortening beforehand, removed the boards afterwards. A bit less leveraging.

Repeat the same process for the second side wall. Thats about as far you can get with one pallet, and if you have some 30cm-pieces, you can start fixing the pieces together now. Alternatively, start dissecting the second pallet or use leftovers – i should have enough, one would think, but i built too much flower stands lately.

Pallet side cabinet: lower bottom

Pallet side cabinet: lower bottom

So far so good. As always: remember to grind/polish in maximum decomposition state.

“Shelves”. Here, I believe that I overplayed the “will fit somehow”-principle. I need a 30 × 30 floor inside, so I took some 30cm-boards, fixed them from underneath to each other, and after noticing the three pieces add up to only 28cm, i cutted down the sidebar on the one side down, using the other one as fill-uüp for another 1,5 cm and go for it. quite the same issues above: everything became slightly crooked and I was very glad when after all sides were fixed, i managed to get the “overall stability” and also straighten things again (mostly). Anyway, i should not rely on this “will get straight somehow” in the future, its simply risky and you just don’t know beforehands.

Wind light: upper shelf, suitable for A3 picture frame width

Wind light: upper shelf, suitable for A3 picture frame width

Wind light, cabinet doors

Wind light, cabinet doors

Supreme shelf, glass plate stand

Supreme shelf, glass plate stand

One can do better and more precise, i have to admit. Yet, i leaerned a lot for some projects to come :) See above, learning curve: the next time i’ll do it the other way round; from an exactly built internal glass plate stand to the outside.

At this point I started using another pallet: i needed more of the long (90cm) panels. Generally, it was a bit of patchwork at this point, I wanted a nice front door with a bit more “rough” front panels, but then I had only some more 90cm-panels from some cheap dispoable pallet i used for the back panels. They don’t look as good, but they won’t be looked at doo often.

Wind light, with top bezel fixed

Wind light, with top bezel fixed

Glass holder, securing metal angle

Glass holder, securing metal angle

Wind light, shelf and doors

Wind light, shelf and doors

Now, varnishing. Once again quite an “Oops” when you see the change in wood coloring after the oil finish. Yep, my first pure linseed oil treatment. I got this tip at a pallet construction workshop recently (story follows). Pure natural product, easy to process, the grain looks great and for indoor use its a nobrainer. For outdoor, regular aftertreatment would be required, for the oil finish isn’t throughoutly weather resistant. Only drawback: it has a distict smell, which one should like or, at least, tolerate. It vanishes over time, but not completely. But … whoa, these are colours coming out of simple pallet wood, treated with colorless linseed oil.

Pallet wood, linseed oil treatment: Front door, first half

Pallet wood, linseed oil treatment: Front door, first half

Wind light, completely varnished with linseed oil

Wind light, completely varnished with linseed oil

The last picture shows the A3 glass panes for which I simply used the glass from EUR 4.50-cheap picture frames from the hardware store.

To make the long story short: placing the finished sideboard in place, i slipped a bit and crashed three of the four glass panels.

Subsequently, the store had run out of A3 sized picture frames and I had to switch to A4 landscape format. Nice, but not as intended.

Done for now - with A4 sheets of glass

Done for now – with A4 sheets of glass

Gaffatape fixes the world

Gaffatape fixes the world

The Gaffa needs not to fix/hold anything, its just keeping the marble granulate from falling into crevices and into the cupboard interior. The glass part becomes a bit “short” for my taste, being covered by wood for quite some centimeters. Again, I plan the second attempt with sawed slots in pallet spacers (with branding!).

Now, crushed marble granulate. Cheap in the gardening section of the hardware store. And the final details, then it looks like this:

Wind light, with marble granulate padding

Wind light, with marble granulate padding

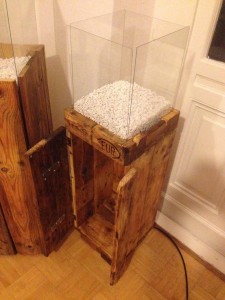
Wind light, finished, open

Wind light, finished, open

Wind light, finished, closed

Wind light, finished, closed

Again a case of “Would have made it completely different after making it”, but anyway: I like it, even if one – as often already – wouldn’t have expected it while some phases of the construction. Again: check out the second attempt.

The post Side cabinet, wind light from pallets, photo frame glass appeared first on Pallet Furniture.
Side cabinet, Wind Light made of Pallets: second attempt

0
0
Pallet lanterns, side cabinets, Version 1 and 2 (right)

Pallet lanterns, side cabinets, Version 1 and 2 (right)

As announced: the first small pallet wind light/cabinet caused some “hm, try different next time”-thoughts, and so I tried different. Just got three pallets from a friend, so why not try an alternate version directly afterwards? This time directly planned a bit smaller and with A4-sized glass panels – the A3-panels for version 1 are now replaced, after i broke them doing the last neccessary tasks. Material needed: besides the glass, exactly one Euro pallet should do it.

We need four spacers for the upper part. Arrange them as seen to form a square in total. Connect from below with correspondingly sawn pallet boards. Distance to the margin of the spacers: obe panel thick – so we can attach the cabinet sidewalls. Reminder: I built the first version “inward from the side walls”, and was very unhappy with the typical inexactitude of the material. The strategy to build outward from a cleanly made square cover seems therefore better, more straight and solid. The price you pay: it is now one of those “pallet projects” where really only the individual elements have “pallet style”, for the raw material, the pallet, gets dissected completely. Virtually no piece of wood here is in the initial state of the pallet to each other. More work, less “pallet style”, but a quite clean look and a solid construction.

Take measurements: upper part made of spacers

Take measurements: upper part made of spacers

Fixed upper part, penciled cutting lines

Fixed upper part, penciled cutting lines

Since we use its glass panel, you can use the back of the cheap A4 photo frame to draw the slots for the glass (and to check directly after sawing for the correct fit – but be careful, the glass is usually slightly thinner). I took it a bit more easy and just completely cutted from one end to the other with the circular saw, three centimeters cutting depth. The cuts have to create an “inner square” of 24,7cm, the short side of an A4 rectangle.

Wind light top, glass panel test

Wind light top, glass panel test

Footboard, Shell made by sawed spacers

Footboard, Shell made by sawed spacers

Footer and top parts of the pallet cabinet

Footer and top parts of the pallet cabinet

Four out of six narrow spacers consumed, remain two and three “fat” ones from the middle row. The latter had to be adjusted a bit, since they would protrude otherwise. The result is arranged here together with the top part only for the aesthetics of the photo :). The panels are simply pallet planks cutted to 30cm each, forming the needed square. Beautiful brandings to the front :) And as always – sanding when the maximum state of dissection is reached. Here, i mostly practised a continuous “lever – saw – sand”-triathlon for each part dissected and fixed to the resultung cabinet.

After all “exact science”, the following got improvised a bit. Sidewalls are 60 cm – for the simple reason that a standard Euro pallet board has 120 and cutted in halves, i get exactly two per board and enough for the whole thing. So prepare your sidewall boards. Sometimes you’re lucky and have a fairly accurate 15cm-board width, then you have one board, one sidewall. Most of the time, you’ll have widths of 12 or 13 cm, then you need three and cut them to the size to fit.

 Pallet cabinet, two side walls, from inside

Pallet cabinet, two side walls, from inside

Pallet cabinet, two side walls, from outside

Pallet cabinet, two side walls, from outside

Pallet cabinet, two side walls, footer on top

Pallet cabinet, two side walls, footer on top

I simply screwed the side walls on the upside-down top part. I placed a pallet bank edgewise on it for exact-upwards/rectangular placement of the side walls. When two sidewalls are fixed, you can fix the lid on it and also fix the third wall. Cabinet doors follow later.

Wind light, glass test placement

Wind light, glass test placement

Pallet Lantern, wall 3 work in progress

Pallet Lantern, wall 3 work in progress

Looks straight. In any case, better than the improvised work of the first attempt. Now, the third sidewall after which i ran out of the easy-to-build-with-boards with 15cm width. For the front (well, front doors) i need three boards.

I actually liked the 1/3-2/3-ratio of the doors of the first attempt. So, same here. Look for matching boards, cut to size, sand, screw two of them with fittings or wood. Attach hinges, fix doors to the cabinet walls.
Now, we start with the last details. Again, i want crushed marble in the candle frame, so we have to close the gaps between the upper spacers/glass sockets. Just saw out matching wood pieces and assemble.

Cabinet doors, preparatory work

Cabinet doors, preparatory work

Wind light, first door fixed

Wind light, first door fixed

Wind light, side fairing

Wind light, side fairing

Here I used two metal angles of unknown origin, anything will do here, snice it gets covered later. Something for the learning curve: working *small* pieces of wood with the belt sander should be done carefully, otherwise you can get quite stupid injuries (like i did here). Could have been worse, something between bruise and scrape, not severe, but it hurts and is primarily stupid and avoidable.

Addendum to the doors: I’ve got the hinges fixed in a manner probably not intended. The spare place for the screwball was on the other side, butr i wanted the angles to protrude as seen in the result here. Don’t ask, I liked it that way and understand perfectly well when someone likes it different. Go as you like :)

Hinge, unorthodox usage

Hinge, unorthodox usage

Linseed oil varnish, first half

Linseed oil varnish, first half

Linseed varnishing, complete

Linseed varnishing, complete

Alike the first attempt: linseed oil finish. Have everything cleaned from dust/sanding bweforehand and be surprised by the wood colours coming out while varnishing.

The rest: alike the first attempt, only easier. Plug the glass panes into the sawed slots. I hadn’t even to consider whether/how to duct the cleavages, since everything fits close and tight enough so the marble split does not slip through.

Details: Felt pads underneath (as usual), some improvising with magnets to close doors “firmly”. Of course, you can add shelves/floors as needed. I’m really pleased. Its a bit smaller than the first attempt, but i actually like it better. Final decoration was not made by me, my girlfriend has surely the better taste here :)

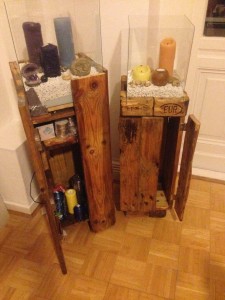
Pallet side cabinet finished, open

Pallet side cabinet finished, open

 Pallet lanterns, decorated and open

Pallet lanterns, decorated and open

 Pallet lanterns, decorated and illuminated


Pallet lanterns, decorated and illuminated

Final Note: As they are shown here, the cabinets are definitely not at all childproof. They don’t fall over easily, but the glass panels are really unsafe, thin and easy to break. If there are children around, this stuff should be avoided, replaced by plastic or a different, not likely to break-material. Picture frame glass panels are definitely not an option then.

The post Side cabinet, Wind Light made of Pallets: second attempt appeared first on Pallet Furniture.
Pallet table: Coffee/Couch table from euro pallets DIY

0
0
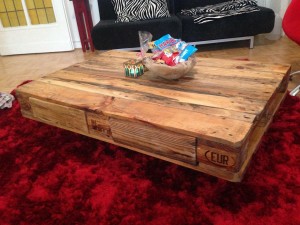
Coffee table made of Euro pallets, nearly finished

Coffee table made of Euro pallets, nearly finished

The Ikea side table was not what i really wanted for some pen&paper role-playing by the fireplace, something bigger and more appropriate was needed, and I was inspired by a “floating pallet coffee table” i saw somewhere on the net and thought, the dfirection is right.

A wrong direction would have been these “pallet, glass plate atop, rollers underneath” stuff which is seen often. I’d like something “pallet only” For that. Next: I want drawers! Therefore, again a warning: the result may look nice, but you don’t actually see all the work invested. Drawers are a real pain in the ass. Without drawers, its definitely easier to build, but hey, it’s cool and a challenge.

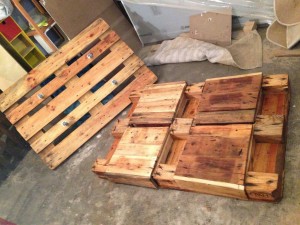
Requirements: three euro pallets, one of which is totally dissected throughout the process (mostly for drawers). One as the tabletop, one (partially) as base element. Next: I wanted the table only “one pallet height” high, otherwise it seemed “too thick” and the drawers would have been difficult to build and most likely look quite clumsy.

The tabletop

Here we go.

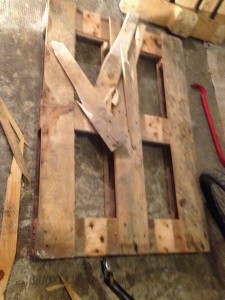
Tabletop pallet, preparations and first breakage

Tabletop pallet, preparations and first breakage

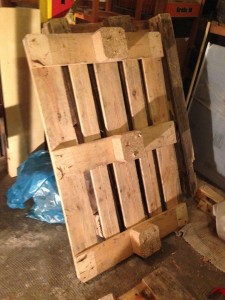
Bottom part pallet, detached footboards

Bottom part pallet, detached footboards

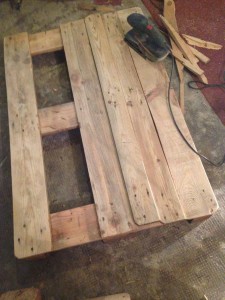
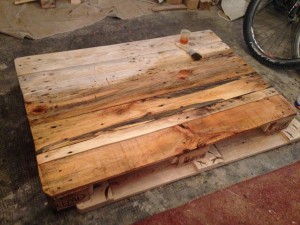
Tabletop, first boards taken from the bottom pallet inserted and sanded

Tabletop, first boards taken from the bottom pallet inserted and sanded

I want the table top without gaps. The boards on the spacers were heavily nailed, i couldn’t dissect them without major damage. So i took out the two “intermediade boards” and closed the first major gap with these. Well. With the “footboards” of the bottom pallet the rest will be ok, those were easier to dissect. Recommended: avoid damaged boards while disassembling, you’re glad about any good piece of wood later for the drawers.

Pallet tabletop, preliminary completed

Pallet tabletop, preliminary completed

 Pallet tabletop, detail, cut-to-fit inlay board

Pallet tabletop, detail, cut-to-fit inlay board

Sand everything, fill up the two gaps. The first board is easy, the second needs to be sawn to fit, and at the second gap, I had some artistic cutting because of a knothole.

Turn over the tabletop pallet. Here (and later) i needed the circular saw. Background: the footboards were massively nailed/fixed to the pallet, i wasn’t able to loosen them without breakage, but I need (shorter, but unbroken) boards for drawers (especially their fronts) with a little more length than the gaps between the spacers.

Cutting boards for drawers - bottom of the tabletop pallet

Cutting boards for drawers – bottom of the tabletop pallet

Sawed boards, wood residues on the spacers

Sawed boards, wood residues on the spacers

Therefore i saw the boards with the circular saw, right cut depth just reaching the spacers, and ideally cutted right next to the first nail (you remove the wood remnants easier then, moreover you get longer boards, which are more flexible in latter use). You’ll need good “drawer material” later and here it is. Wood remnants are easily removed with the crowbar, nails via cutoff-saw. Afterwards. i put the bottom pallet atop the spacers for testing the look and proportions: fine. Remove the leftover center spacers. Combine, this time the upper part up.

Pallet coffee table, shell

Pallet coffee table, shell

Coffee table shell, residues removed, tabletop now on top

Coffee table shell, residues removed, tabletop now on top

Note: the spacers are fixed at the “table top pallet”, the lower pallet consists only of the boards, without any pallet feet/spacers anymore.

The drawer slides

The plan: make the drawer floor almost as wide as the gaps between the planks connecting the boards of the lower pallet. The drawers themselves are again significantly more narrow than the gaps between the spacers. The supernatant drawer bottom acts as a “guide rail”, above which are “guide boards”. I build This slightly too high in the first attempt – make the drawer sides a centimetre lower than the space to the tabletop and avoid additional corrections afterwards. Generally – leave a bit more space then you think you need. At least i did it this way here and with every drawer later (i built quite some) and its a lot of work without correcting afterwards, too.
First “guidance board” mounted on the left, some more (with some recycled broken panels) right.

Tabletop pallet with wood scraps on spacers, below

Tabletop pallet with wood scraps on spacers, below

 Drawer guide boards, all parts sanded

Drawer guide boards, all parts sanded

This is the beginning of a lot of sawing and sanding. Saw all “guide boards” into fit (as told, have them a little less high than I have them here), sand, assemble. In the frontal view onto the “folded-shut” table you can see where we’re heading. I had the vague hope that the emerging “small side niches” would also look nice, but in the end you don’t see the rear walls at the finished object.

Drawers guidance boards, mounted

Drawers guidance boards, mounted


Drawer hole on the pallet table side, front view

Drawer hole on the pallet table side, front view

Drawers

Floor: as available, i used two of the “broader” pallet boards and one of the narrow kind. For side and rear panels you’ll have to take whats there, the more broad pieces you can use for floors, the betterr 8and the less construction efforts). The front gets important again: I liked best the “sawn out footboard parts” because of their carvings on the edges. Moreover, they were quite likely to come out as very beautiful wood, once sanded and oiled.

Drawer bottom, measured, before sanding

Drawer bottom, measured, before sanding

Drawer assembly in the drawer slide

Drawer assembly in the drawer slide

The first drawer. Cut the Floorboards to a width leaving a centimeter space at both sides to the “bottom pallet guidances”. Sand, assemble the sideboards (I made this in the later drawer hole with guidance boards as an assembly help for easier work, see the picture below). Also cut/grind/attach the front board.

Drawer and insufficient raw material

Drawer and insufficient raw material

I am the wrath of God.

I am the wrath of God.

Then i inserted the first finished drawer and noticed how laborious the following three additional drawers will become. Took a deep breath and noticed that i’d run out of wood in any case. That was the moment I completely dissected another pallet.

Nail boards. Something hard to pull everything out

Nail boards. Something hard to pull everything out

Sufficient amounbts of drawer material

Sufficient amounbts of drawer material

Some of the “beautiful boards” of the disassembled pallet were quite a feat. A tip to avoid broken boards – besides cautious levering with the crowbar don’t rermove the boards from the spacers, but the spacers from the boards. I nmanaged to get even heavily nailed stuff loose without broken wood. A perceived kilos nails sawn off with the cut-off-saw, prepared correctly sized panels, and arranged them in the “drawer-scheme”. Seems we have enough material now.

Assembly aid for pallet table drawers

Assembly aid for pallet table drawers

On sanding multiple boards

On sanding multiple boards

Here you see the “installation aid” with the drawer slide. Put the sidewalls in, lay the floorboards on top, fix them with screws, turn around, cut back- and front-panels to size, sand, attach. I eventually switched to a “multiple panel sanding” strategy of a bunch of pre-cut boards, inserted into the pallet boards for fixation and being a bit quicker than otherwise.

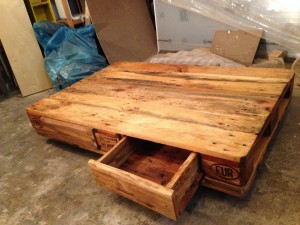
Finished drawers in an open pallet coffee table

Finished drawers in an open pallet coffee table

Finished drawers in a closed pallet table

Finished drawers in a closed pallet table

The end result, once open, once closed shut. Recommended: mark every drawer and its indivuidual position at top and bottom table part. Whats mounted in the “docking bay” front-right won’t possibly fit as well left-front.

Glazing/Linseed oil varnish and coffee table wheels

Glazing/Linseed oil varnish and coffee table wheels

Pallet table, tabletop, partially varnished

Pallet table, tabletop, partially varnished

With the pallet lanterns/windlights I switched to linseed oil finish, here alike. As usual, the wood changes its character completely during the varnishing. Once you see the tabletop varnished/unvarnished, then the complete tabletop varnished. Note: i grinded with about 80, max. 120 grain sand paper, better use a finer grain for finishing of the sanding part – 180 makes a huge difference in the varnished result which you won’t notice really before varnishing.

Coffee table, varnished, open drawer

Coffee table, varnished, open drawer


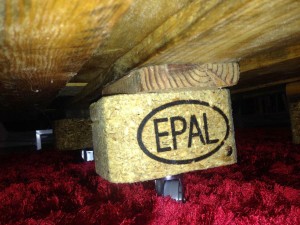
Elevated pallet table, wheel and additional foot element

Elevated pallet table, wheel and additional foot element

Another “i should have known better”-moment: I brought four small furniture wheels from the hardware store, mounted them before glazing and after finally assembling the whole thing, the result was too low.

 Pallet table, complete linseed oil finish

Pallet table, complete linseed oil finish

Pallet table, finished

Pallet table, finished

Since I did not want to dismantle the entire table again, I improvised with four spacers I attached to protruding wood pieces, attached the wheels to the spacers and again the spacers through the protruding wood parts below the bottom part of the table. This is obviously suboptimal – it would have been nicer to disassemble the table again, attach the spacers with screws from the inside through the board and attach the wheels afterwards. On the other hand, you can’t actually see this improvisation unless you lie down on the floor. So, everything’s fine.

… Except that the result, despite all the sawing and grinding is nearly two pallets heavy – even without the drawers – and needs to be dragged out of the cellar now. But the result is quite conciliatory.

Conclusion

Fine, I like it. Heavy and solid, but still easy to roll. Time needed: about three working days, I think – what is quite much and you don’t actually see it in the finished piece, since drawers and their guide boards are the most elaborate parts and the details are simply not visible. You should definitely have a good belt sander for this, otherwise you’ll go mad. For a first pallet project its oversized. But if you are looking for a smaller challenge – here you go.

Last todos: We were undecided whether we use normal handles on the drawers or perhaps simply drill two holes and make a loop of thick hemp rope. The latter was the style of choice.

Pallet table, with handles on the drawers

Pallet table, with handles on the drawers

Used a 14mm drill on the drawers. Two holes in the drawers, end of the rope from the front in, pull through a fair bit and make a knot. Same with the other end, make the loop tight. With some security overhead, cut the rope and knot the other end on the drawer inside. Repeat x3.
I repeat myself, but it looks fine to me. One can still elaborate with metal mounts round the rope holes, but I doubt that it would be cool, and on the linseed oil-treated wood pure rope looks fine and fixations won’t hold with glue. But do as you like :)

The post Pallet table: Coffee/Couch table from euro pallets DIY appeared first on Pallet Furniture.
Tealight pallet-chandelier: pallet wood, beeswax finish

0
0
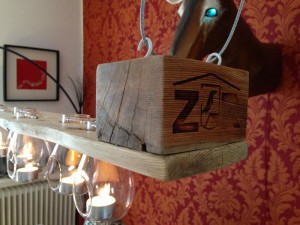
Tealight candle holder, from pallet wood, lit

Tealight candle holder, from pallet wood, lit

My dearest bought some cool looking tealight hanging glasses and had the idea to build a kind of hanging table chandelier. On the last euro pallet we had a pretty birdlike brandmark, and since the “pallet candelabra” was to hang over the dining table, some more precise and clean work and especially finer sanding was needed, I did not bother the quite rugged look of the raw material, though, what was a good thing: newer wood tends to splinter, and i have the feeling that the older pallets often have the cooler textures.

A new “varnish” test also: liquid beeswax. Should come out brighter than linseed oil, it did, and smells great. But I get ahead of the actual work.

Beautiful pallet firemark for the tea light chandelier, untreated

Beautiful pallet firemark for the tea light chandelier, untreated

Pallet material for a tea light candle holder

Pallet material for a tea light candle holder

When you take one of the broad boards, you can place the spacers transversely with the branding sign outward. I wondered about spacers lengthwise and using a narrow board, but it seemed to me somehow unbalanced. Lever out the broad panel of your choice, pry off two fine spacers, sand everything (and be cautious not to grind the branding signs off). The board doesn’t need to be entirely “straight”, I even sawed off some edges with ugly, splintered or otherwise unwanted looks. Main point: have it sanded fair and smooth. I liked the result.

Branding, sanded carefully

Branding, sanded carefully

Pallet board, sawed and sanded

Pallet board, sawed and sanded

Some easy sanding, compared with larger projects. Nevertheless, here for the first time i worked with coarser and finer sanding paper, down to about 120 grain (180 would have been even better and is recommended for “fairer” studff like this). With a wax finish which tends to emphasize scratches and a somehow exposed position of the finished work, I wanted smooth wood and no scratches, joints whatever

Then: spacers crosswise to the board ends.

Tea light candelier, board and spacers assembled

Tea light candelier, board and spacers assembled

Pallet finetuning in backlight

Pallet finetuning in backlight

Cleaned result- I used a simple paint brush to cleanm the wood and get the remaining dust out of joints. Now mark the holes for the suspensions. I had penciled the “top” of the board, in retrospect, I noticed, marking on the borrom would have been smarter, but both ways have advantages and disadvantages.

Mark holes for the tea light holders

Mark holes for the tea light holders

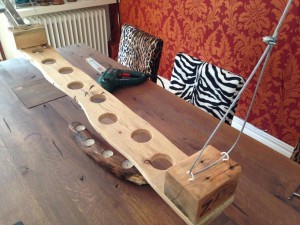
Tealight holder holes, drilled

Tealight holder holes, drilled

Here my electric drill joined the choir invisible. He was a brave thing and drilled and screwed under sometimes really heavy conditions and difficult circumstances, and it was a new experience to me to learn how thick the smoke can get out of such a small machine when it finally bites the dust. A Brief moment of silence.

I only worked with a cup drill (recommended), which seems to have tilted, i think this was the reason for the final machine breakdown. Afterwards, i used a 55 mm knothole drill(?) (center bit?), but that creates a “big hole” instead of a round cutting.

Tealight holes, finishing details

Tealight holes, finishing details

The problem while drilling “top-down” – when you drill through, the wood splinters. You also have less space underneath (well, depending on where you drill, i simply pu a pallet below the workpiece)

I liked the “splintering” though, since it drove me to some additional sanding and, as a result, nice curved edges and structures.

If everything is drilled and sanded clean, on to the beewax varnish. In the case of this finish: have your wood exactly as you want it: you have no chance in additional grinding/sanding with a waxed wood surface. I sanded some linseed treated wood, its no fun, but its possible. Same with wax: you just wax your sand paper and there goes the grinding effect.

Liquid beeswax glaze, varnishing halfway through

Liquid beeswax glaze, varnishing halfway through

Beewax glaze, before and after varnishing, detail

Beewax glaze, before and after varnishing, detail

Definitely brighter wood compared to the linseed oil varnish. I love it. In case you compare projects here directly: take into account that i sanded here finer than the “linseed projects” and the wood sorts differ quitze heavily from time to time.

First test configuration with tealight holders

First test configuration with tealight holders

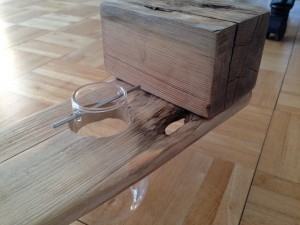
Tealight glasses, suspension, detail

Tealight glasses, suspension, detail

I’m sorry, i don’t know where the glasses are available online. We found them in Wuppertal in a small shop, let me know if someone finds an online source.

And now up in the air. Two hooks drilled into each of the spacers (so you can adjust the result easier than with one suspension point only), use as suspension what you like. We had chosen steel wire.

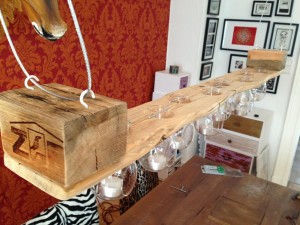
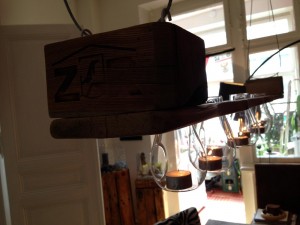
Tealight candle holder, hung

Tealight candle holder, hung

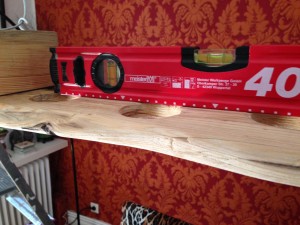
 Water level comes in handy

Water level comes in handy

Level the candelaber in all directions. The steel wire suspension I fixed with screw clamps, you can easily adjust the length right and left to achieve straight hanging.

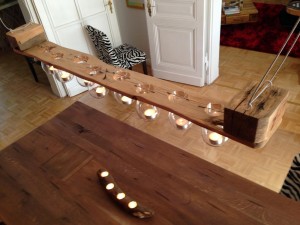
Tealight candle chandelier, hung

Tealight candle chandelier, hung

Pallet luster, lit

Pallet luster, lit

Yep. Thats it. So what about the material consumption and effort? A pallet (hehe), more precise: about a quarter of it. The tealight holder glasses, beeswax glaze, steel wire and four screw clamps, screw hooks, a few sheets of sandpaper and a new electric drill. As said before, cup drill recommended, center bits are overkill – they just were around since i had some other tealight project. Time: one afternoon, definitely not more, but take your time for really clean sanding.

Tea light candle, lit, detail in backlight

Tea light candle, lit, detail in backlight

Hanging pallet candle holder, lit from above

Hanging pallet candle holder, lit from above

The post Tealight pallet-chandelier: pallet wood, beeswax finish appeared first on Pallet Furniture.
Bathroom cabinet: cupboard below sink from pallet timber

0
0
Bathroom cabinet made of pallet timber, finished, detail

Bathroom cabinet made of pallet timber, finished, detail

An experiment, and to be honest, against some kind of “pallet philosophy”: made with completely disassembled pallet wood. I always lack the “real pallet-like” feeling. The background here: the dimensions are given, you can not build a cabinet a half pallet size wide because it will be significantly too narrow (otherwise: too wide) for under the sink.

Considerations: the space beyond our washbasin is quite “standard”, 60 cm wide, 60 high, 40 deep. The usage of “standard pallet parts” won’t work since a typical “half pallet” cutted at the central support will become like 50 deep and 70 wide. Therefore: complete dissection and building from scratch. Since I had some spacers left my first considerations went analogous to the kitchen cabinet: “stacked branding signs”, so to speak.

Bathroom cabinet: concept considerations

Bathroom cabinet: concept considerations

Pallet cabinet: baseplate completed

Pallet cabinet: baseplate completed

“Stacked brandings” looked uncool, whether vertically or horizontally. Made a shaky impression and would use a lot of screwing/fixing parts “over the corners”, finally, it uses up space without really looking convincing. So, instead, four spacers to the front and some cutouts at the front doors to show off the brandings. That was the plan, and before working it out in detail, first the bottom panels and some footboards.

Cabinet floor, with cut edges for side boards

Cabinet floor, with cut edges for side boards

Bottom plate with the lower corner pieces, already linseed oil-stained

Bottom plate with the lower corner pieces, already linseed oil-stained

Thoughts while construction: the upper boards of the bottom plate were cut/short at the edges – the gap will be used to put the vertical side boards in. Next: a) sand everything here (reached maximum dissection state) and b) glaze with linseed oil. The piece of furniture will be placed in the bathroom, where it is moist/humid, and I want the wood oiled everywhere, not to have some damp or even moldy edges in a year from now. FYI. it’s about half a year in the bathroom now, everything still looks perfect.

Its my first test case for linseed oiled furniture in a damp environment, so far it looks good.

Cabinet-top, bolted from below

Cabinet-top, bolted from below

Bathroom cabinet, upper cabinet board

Bathroom cabinet, upper cabinet board

The bottom plate is fixed with footboards. On the top plate, I did not want these, the single boards just needed to be attached in a sufficiently solid way, even with the cutted holes for drain and water supply. Therefore: corner pieces/spacers, two light wood slats and two metal fittings in places that needed some extra fixation.

Assembly of the first side wall

Assembly of the first side wall

The side wall. The foremost boards have cutouts at the top and the bottom, so the brandings of the spacers in the cabinet corners are visible. This was made mostly by rule of thumb – its helpful to measure exactly, but as long as there are no gaps, a centimeter more or less does not matter.

Nevertheless, I occasionally hate my affection to build stuff sometimes “just somehow”. Nevertheless, if you want that water levelö proof, you’d have to cut, saw, work much more exact. Funny enough, until now, it worked out my way as well. I don’t know exactly, is it luck, or just the flexible material “pulling straight” in the final assembly, or just some routine, that i learned to work simply cleaner/more exact just “out of the hand, probably a bit of everything. Here the goal wasn’t a shut tight cabinet either – its in the bathroom and i like the thought that there are no unvented corners.

Side walls and the upper plate, fully assembled

Side walls and the upper plate, fully assembled

Pallet cabinet shell, front, top, walls straight

Pallet cabinet shell, front, top, walls straight

Doors - right sanded/glazed, left the raw boards

Doors – right sanded/glazed, left the raw boards

When the frame is up and everything is straight in its place, the rest will be simple.

You lay the “door boards” atol the front opening, pencil the lines where you cut the surplus wood off, cut, sand, varnish and assemble the boards for each of the two doors. I simply attached them from the inner side with some leftover slats.

MIssing after the first final assembly: door handles. Until now – just didn’tz see something what loked like “hay, thats it”, and its fine without them. Later attached: Magnets, in order to have the doors really closed.

Bathroom cabinet, half open

Bathroom cabinet, half open

Pallet wood cabinet, open

Pallet wood cabinet, open

Requirements: I guess I have used here about one single Euro pallet – it’s a little hard to say, because I have also some spare wood residuals from old projects. But you should be OK with one pallet. And a slightly longer afternoon, where once again the sanding is/was the main work. Later: some cupboard door magnets, “angeled” – you need to screw the magnets as well as the metal plates they attach to, its nearly impossible to glue on oiled wood :)

 Bathroom cabinet from pallets - Completion


Bathroom cabinet from pallets – Completion

Bathroom furniture made of pallets: It works.

Bathroom furniture made of pallets: It works.

Impression afterwards: i Like it. How the linseed oil / wood will withstand the bathroom environment, time will tell. Half a year later it still tells “OK”.

The post Bathroom cabinet: cupboard below sink from pallet timber appeared first on Pallet Furniture.
Euro Pallet dresser with bark beetle branches and LEDs

0
0
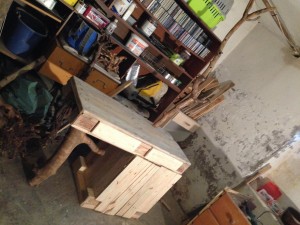
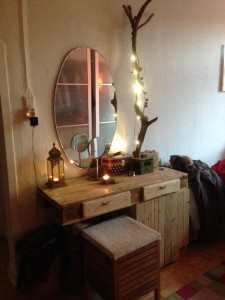
Palette dresser with bark beetle tracked wood and LED lighting

Palette dresser with bark beetle tracked wood and LED lighting

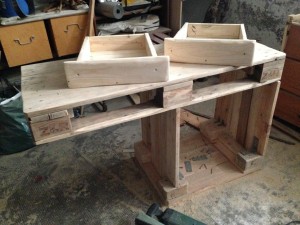
Slightly bigger project, with a background story. And some “non-pallet-material”. It all started with my dearest wanting to make some rustic forest work pictures. More precisely, we wanted some cool looking wood for tealight holders. Looking around in the forest, we found a great-looking, bark-beetle gnawed small tree. Beetles/larvae all gone, so we sawed our parts off. And there, we remembered that we would need a dresser for the bedroom and some elvish/wooden looks would be nice. One thing led to another.

Why not take such a gnawed tree branches as a table leg, or somehow as “table structure” for attached lights, we had some rough considerations of that kind, and so the wood excursionbecame the prequel to the dressing table as the next project. In any case, an entirely new form of procurement of materials, beyond the usual “where to get pallets”.

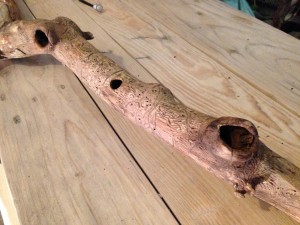
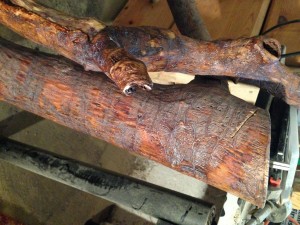
We brought some beautiful pieces of bark-beetle grawes wood, I cut some as a test for its looks, had it sanded a bit to see how the aisles and the wood would look like, and it looked fine. Fine.

Here, a dressing table is made

Here, a dressing table is made

Bark beetle wood pattern, gnawed larval aisles

Bark beetle wood pattern, gnawed larval aisles

Regarding bark beetles, we checked Wikipedia and I had to laugh a lot, since they point out the economical problems of bark beetles; gnawed wood results in a significant loss in value. Of course its a grave issue if you have this kind of vermin in a forest, but we were absolutely thrilled by the great textured wood and thios information was quite in contrast to our excitement. Nevertheless: they go for living wood, our branches weren’t inhabited any more. I checked regularly also after varnishing/building, looks we’re perefectly safe. Note here: i don’t know the different wood vermins and can’t give general advice here. We found the branches in a quite well worked forest, so i strongly assume if they were still infectuous/inhabited, the wood workers wouldn’t have them kept lying around in the forest after cutting the stuff down.

Back to the classic raw material. Some of the readers will be familiar with some of my standard procedures, so I will be brief here, on issues like build a “closed table surface”, for example.

 Pallet raw material, well known

Pallet raw material, well known

Dresser table surface, rearranged boards

Dresser table surface, rearranged boards

Material requirements: two pallets minimum You need quite some wood/boards for he drawers, and if you don’t use branches as table legs, you’ll need material for that, too. The plan was to build drawers (like the pallet coffee table) and a narrow cabinet (similar to the bathroom-cabinet). The “Second leg”, the rest of the substructure? Here I thought about the thick log part of the tree we brought. Hm, yes, that’s it.

Dresser, structural plannings 1

Dresser, structural plannings 1

Dresser, structural plannings 2

Dresser, structural plannings 2

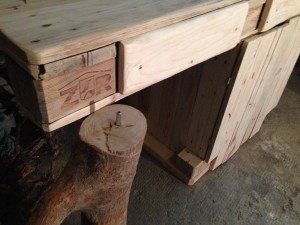
Therefore, we start with the “cabinet part”. In the same height, we’ll cut the log later and use it as a table leg.

Frame for the cabinet

Frame for the cabinet

Dresser, partly built - the table surface lays already stable

Dresser, partly built – the table surface lays already stable

Since we’re at it, you might as well make the guide rails for the drawers.

 Drawer guide boards

Drawer guide boards

First cabinet side wall, detail

First cabinet side wall, detail

At the side wall, i had once again the “pallet effect”: it’s not an exact science, I sawed everything straight, but well, something always comes out warped. I cutted a narrow wedge for the gap i had after assembling the boards. First, I fixed the side walls with metal fittings, but then I liked a “plain wooden” solution better with employed counterparts down and up at the top and bottom pallet element better. You see it below in “…and pallet drawer number 2” on the footboard / inside the cabinet.

Cabinet side wall 2 and guide rail

Cabinet side wall 2 and guide rail

Drawers, before processing

Drawers, before processing

Building drawers is terrible. An eternal sanding and sawing, and you have the feeling you don’t make progress at all. I made the second cabinet wall first, but then it had to be drawers. First one, then the other. This time I had sanded everything much finer than the coffee table, but if you really want to avoid any scratches from sanding, you have probably at least use sandpaper with 180-grit to finish (I had used 120 max.) Annoying: some woods you just don’t get smooth, and at some one thinks that it is smooth now, and you see scratches again as soon as you varnish. My luck, that i actually like the slicghtly rocked/shabby looks.

 Drawer number one...

Drawer number one…

...and pallet drawer number 2

…and pallet drawer number 2

Note to number one: I had taken one of the coffee table drawers as a pattern. It was pretty blown away how drastic the effect of linseed oil vs. untreated/sanded is.

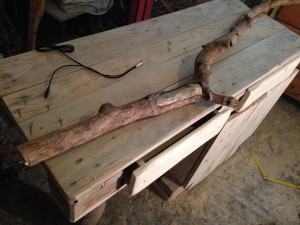
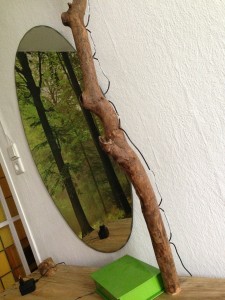
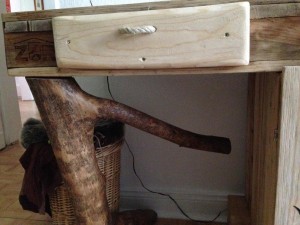
Now things become exciting. I wanted to use one of the thinner branch pieces as a “superstructure” next to the wall mirror above the table. I drilled a 40mm hole in the table, and then sharpened the branch end fit. At first I thought I need fixture from below, but it will not budge simply plugged into (and this way, it can be carried separately).

 LED tree branch, in construction

LED tree branch, in construction

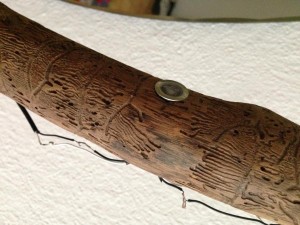
LED holes in the tree branch

LED holes in the tree branch

The holes I drilled with 16mm, I had ordered a set of 10 LEDs with 15mm mounting diameter in advance, 10 × 0,07W warm white. Amazon reviews say that they are OK, on other platforms i saw a few disgruntled customers with negative “PSU broken” comments and promptly got a set with a broken power supply. No electricity for you, kid.

Table leg mounting

Table foot mountingTable leg mounting

Nearly finished pallet dresser: branch/stem assembly

Nearly finished pallet dresser: branch/stem assembly

Waxing branches

Waxing branches

Short thought if i should be annoyed, but before, i just constructed everything related to drilling. A remaining connection pin of a doorknob became a dowel. Then the whole bark beetle branch was sanded again, cleaned (a dry paint brush comes in handy) and finally, the entire project was treated with liquid beeswax.

Guarantee/Service departments sure do love me. I cutted the plug of an old unused 12V power supply (i have some PSU lying around). held the wires to one of the LED’s contacts, which lit up. Well, use warranty and have to wait anothjer week? Rhetorical question.

Of course i used the old PSU i had around and cutted all the plugs from the LEDs. They wouldn’t have fit through the drilled holes anyway, or you would have to drill quite large holes. I drilled 16mm where the LED was to be placed, deep enough to fit the LED in. From the othjer side i drilled with 8mm to the back or the side of the “LED-Hole”, to connect the wires through. Stick the Cable into the LED hole, pull it through/out the cable hole untilö the LED is fixed. Pulling through with some wire helps.

LED installation, soldering of the power supply

LED installation, soldering of the power supply

LED installation/soldering, finished

LED installation/soldering, finished

Power: I had simply soldered everything open and uninsulated. These are 0.03W LEDs, there is no noteworthy power on the wire. You can of course also consider a nice insulation and some installation on/into the wood, myself, i like the looks of wiring. And solder joints, yeah.

Odds and ends: alikethe coffee table, i used hemp rope as handles for the drawers. Have everything polished a bit. Carry all parts out of the basement (and therefore: don’t fix anything that does not need to be fixed, keep to plugged connections of tabletop, cabinet and table legs.

 Bark-beetle-wood table leg, detail

Bark-beetle-wood table leg, detail

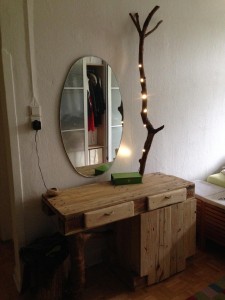
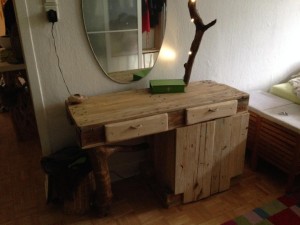
Dressing table from pallets/forest wood and LED, finished

Dressing table from pallets/forest wood and LED, finished

Expenses … about two working days to be net, but it went qwuicker than i thought, just because i made some of the stuff here earlier in other projects and had some routine. And you need a solid belt sander. Seriously, without a) a good belt sander and b) a smaller sander for rounder/finer issues you shouldn’t start something like this, otherwise its a drudgery.

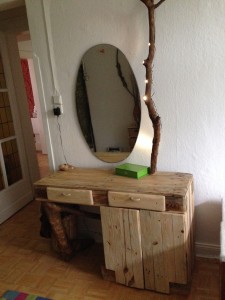
Dressing table from pallets / forest wood and LED, constructed, finished

Dressing table from pallets / forest wood and LED, constructed, finished

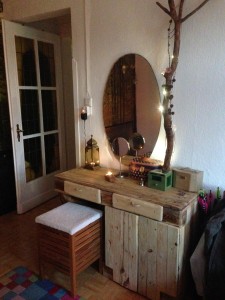
Dressing table, in use

Dressing table, in use

 Dressing table, in use, other side

Dressing table, in use, other side

Optional updates: The table could be even prettier with a second branch on the other side of the mirror also provided with some LEDs, to get the two-trees effect of the gate to the Mines of Moria. You should add an additional shelf into the cabinet. Magnets to the cabinet door, for a solid closing. A big red button for light on/off. (what i actually did, later – well, with a green button, but hey.)

The post Euro Pallet dresser with bark beetle branches and LEDs appeared first on Pallet Furniture.

Cat scratching post and cat house from pallet wood, bark beetle wood

0
0
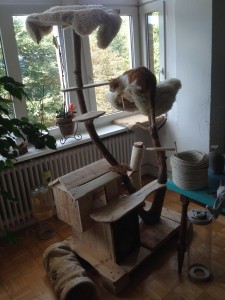
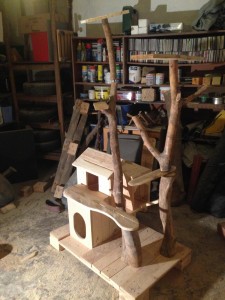
Cat scratching post, cat hut: First test-resting on top

Cat scratching post, cat hut: First test-resting on top

We have a new roommate, who needs some home furniture. I still have some spare wood from the bark beetle wood action lately (the dressing table), so it comes to mind to build a cat scratching post with an integrated cat villa with viewing platforms.

Once again, no “pure pallet furniture” project – one “raw pallet part” used, a half, modified Euro pallet. Confession: i also dismantled material from my first pallet bed. The half pallet is a very suitable base. Also used: remains of the desk disassembly and a half, new euro pallet. Mostly used as completely disassembled pallet boards, plus two reused pressboard shelves whics were used as side support/legs of the first desk in very early times.

Clearly, its more a recycling but a pallet project, but the typical pallet wood look is there, and I like it.

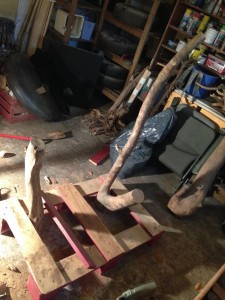
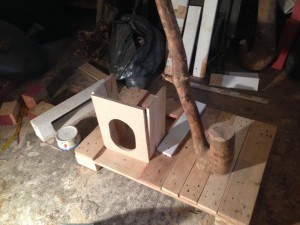
Cat scratching post - half pallet base platform

Cat scratching post – half pallet base platform

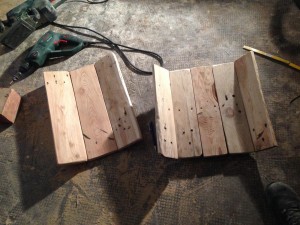
The basis. Half an Euro pallet, from which one half is covered completely with planks. Since we have to fix the poles here, these should be solid, not kinda splintered or otherwise crumbly boards.

I painted the pallet for the bed usage eaarlier, so I had to grind sharp anyway. For the first time here. no treatment/glazing at all, so give it a good sanding, also to have no dirt, splinters, painting leftovers, whatever.

The barkle beet branches are also sanded, their ends cutted straight, to have a solid fixture later on. I just used longer/thicker wood screws (about 10cm) and drilled four of them through the floorboards into the trunk. Given the solid floorboards, this seems very stable to me, but if you have heavy wood, lighter palette boards, etc., consider reinforcing with metal underneath. As I said, the longer the stem, the greater the leverage. Last not least: some cats may have some more weight and destructive energy as others to add to the needed stability considerations.

Cat scratching post: first branch  mounted

Cat scratching post: first branch mounted

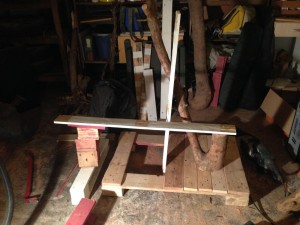
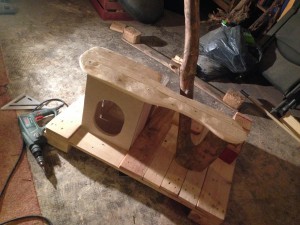
Cat Cottage, ground floor: Construction

Cat Cottage, ground floor: Construction

And here it ends with the “pallet elements”. All following work uses tree trunks/branches and much abraded pallet boards. The “floor” goes through the hole in the base pallet on a suitably sawn pressboard piece.

Roof of the ground floor/balcony

Roof of the ground floor/balcony

Upper floor, floor

Upper floor, floor

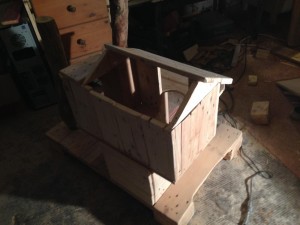
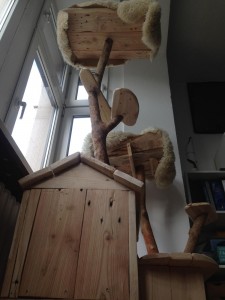
Cats Cottage, upstairs with gable roof

Cats Cottage, upstairs with gable roof

Same goes for the “entrance front”, since I was too lazy to cut several boards and do the additional grinding. In retrospect, i regret it: we had painted the front later, since it just didn’t look good with the “normal wood”.

The second floor. Skipped some work progress here, but that’s really cutting boards to size, grind, attach. The “hatch” leads through the ceiling of the basement to the first floor and also directly to the balcony. All edges need to be rounded/sanded accordingly.

Placed behind the second tree trunk: this is not one of the bark beetle wood branches, but some other branch we found in the forest. Also simply fixed with solid wood screws through the bottom floor.

Now some smaller boards, simply to be placed on the branches ends.

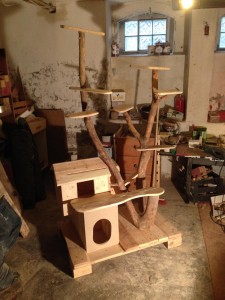
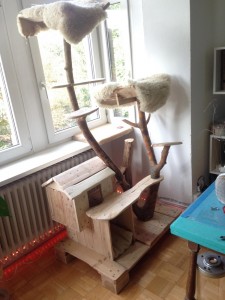
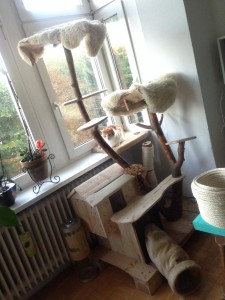
 Cat cottage and scratch pole, mostly completed


Cat cottage and scratch pole, mostly completed

Abraded seat boards in different heights, connectors

Abraded seat boards in different heights, connectors

I just drilled holes with a 18mm drill into the branch tips and abused some leftover copper tube from the lighting structure of the steampunk desk as connectors. Idea behind: from now on, the whole construction is so heavy that I want nothing “fixed” anymore, but “pluggable”, to keep the whole thing transportable.

A nice side effect: if you’re finished and (like me) have ideas to change/improve the whole structure again, it’s modificated/rebuild easily. Example: the platforms turned out to be too small, specifically, at least these on top to sit/lie onand need to be wider. We will come to it.

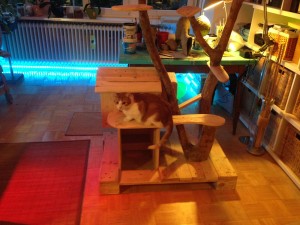
First test sitting

First test sitting

The cat is skeptical. I was, too. Everything seemed a little too high and somehow unbalanced, and what bothered me in particular were the missing large, comfortable high places to have a nap on. Nevertheless, it was quite reassuring that the landlord at least deemed the balcony as worthy for an examination.

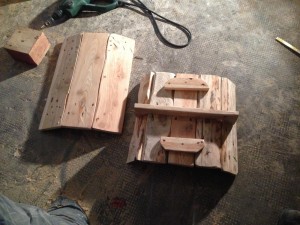
Anyway, back to the basement, cutting a few boards more. To be exact: two. One broader and one narrow board were left over, both of pallet-typical 120cm length. One sawn to 4 × 30 (narrow) and one to 3 x 40 (wide), two boards each cutted at the edge obliquely with the jigsaw and bolted.

Lawns, bottom

Lawns, bottom

Lawns, top

Lawns, top

Upstairs again. Reminder: straight cutted, solid branch/trunk ends are crucial. The piece of branch that was attached to the posterior branch which seemed too high and shaky, transdformed to a solid improvement of the balöcony structure after having it cutted better and fixed with the 18mm copper tube connection.

In the meantime, my girlfriend painted the rather ugly, eyecatching front entrance panel, and I wrapped an about 8mm thick Sisal rope to the rear trunk and fixed it with hot glue.

Cat scratching post, cushioned sunbathing areas

Cat scratching post, cushioned sunbathing areas

Sisal rope round the scratching post

Sisal rope round the scratching post

Cat cottage platforms, from below

Cat cottage platforms, from below

The master benevolently accepts his gift

The master benevolently accepts his gift

The Master took note of the latest improvements and kindly accepted his gift. Since then, he’s encountered frequently on the middle deck area. Off the record: he’s a fraidy-cat and is scared of the entrance, and once he climbed to the very top, we were proud as hell, regarding this incredibly brave cat. But while he majestically enjoys the middle observation deck, these little character flaws can be overlooked.

Time needed: A bit more then a weekend. Material requirements: about one pallet, plus branches. Everything now completely untreated and only sanded.

The post Cat scratching post and cat house from pallet wood, bark beetle wood appeared first on Pallet Furniture.
Pallet Furniture Inspirations: Poland, Wuppertal and other

0
0
 Pallet benches in Poland

Pallet benches in Poland

First, we had some holiday somwhere around Katowice, Poland, and well, they make use of pallets for furniture stuff there, too. Second, some people here at home at “Utopiastadt” do some nice and creative stuff, and i’d love to join in, but there’s also still some stuff to do here. But nevertheless, some third-hand-inspirations.

One of the beautiful, flower-decorated polish pallet benches and – simply made – tables that we came about there. I was reminded on the pallet benches in Bochum, while these were slightly more handsome, I must admit, although I am completely for the “Ruhrpott” otherwise.

I have to admit, i like the flower pot decorations. Though i’m not really the “flowery” type. NEvertheless, when you see it here, it becomes an obvious, if not obligatory add on.

Pallet benches, Poland, front

Pallet benches, Poland, front

The inevitable stacked pallet table, Poland

The inevitable stacked pallet table, Poland

What amused me in Poland: very pretty pallet stacks with innovatively cutted vegetable display. Somehow a bit “pallet stack overkill”, but it looked pretty and since then, I keep thinking on this slanted half pallet and how it could be used in other constructions.

Pallets in Poland, shopping center

Pallets in Poland, shopping center

Pallets in Poland, exciting slope

Pallets in Poland, exciting slope

Pallet beer table set

Pallet beer table set

Thats all from there. Back in Wuppertal we visited – thanks to some guests we had then – some corners where we wouldn’t have been otherwise. In downtown we saw a most charmingly – albeit using heavy metalwork – manufactured pallet beer table.

As a part of this tour we were also in the “sculpture park”. I can highly recommend it, in case that you visit Wuppertal or the area here and are interested modern art. I do not know if this one is still running, but the following two pallets were the basis of two sculptures of Erwin Wurm’s “Am i still a house?” – exhibition, and these sculptures touched a few things in me, but here, I’d tell only about pallet related stuff: once beautifully “beveled” pallet planes and a very exciting color. Nothing to see of the art works here – have a look for yourselves there 😉

Pallet pad, exciting coloring

Pallet pad, exciting coloring

Palette pad, beautiful bevels

Palette pad, beautiful bevels

Then finally, Utopiastadt. They were already awesome last year, and their use pf pallets has improved further. They expanded some “pallet chillout areas” on both sides of the bike lane connecting the city districts of wuppertal, and these do permute happily as needed by their occupants.

Permutable pallet benchs at Utopiastadt

Permutable pallet benchs at Utopiastadt

Pallet benchs, Utopiastadt

Pallet benchs, Utopiastadt

The “Hatter” is the bar providing drinks and culture and is incidentally the only gastronomy beyond various hacker camps and -congresse where I encountered Flora Mate, the best ever Mate variant crossed my palate.

Utopiastadt also provides a bicycle repair station, and an appropriate addon are the bicycle stands they had /temporariliy – there. Somehow an obvious variant of pallet usage, obce you see it. I’d only park the bicycles turned by 90°.

Pallet biycle stand, temporary installation, Utopiastadt

Pallet biycle stand, temporary installation, Utopiastadt

Bicycle stand, disposable pallets, temporarily, Utopiastadt

Bicycle stand, disposable pallets, temporarily, Utopiastadt

What was really exciting: a combination of planter and brightly colored pallet chair. That one is some really massive stuff, seemingly varnished with a white foundation and later coloured with probably weatherproof varnish. I’m excited and do also want pallet furniture with extendable footrests.

Large pallet chair, coloured and with extendable footrests

Large pallet chair, coloured and with extendable footrests

 Pallet bench, integrated flowerbed, Utopiastadt


Pallet bench, integrated flowerbed, Utopiastadt

I think its cool. I stopped painting my stuff some time ago now, but if I would paint them again, i guess something colourful like that would be definitely considered.

Pallet stairs, Kirchheim

Pallet stairs, Kirchheim

Well, and to the whole playful/pretty/rustic stuff, an example of swabian pragmatism. A find that I had to photograph during my last visit in Kirchheim which i had not posted since. I’m still undecided whether this counts as said swabian pragmatism, some “most important: we get into our house”-thing or simply an endearing oddity, probably partly all of that. I am happily amused and will not stand stupid remarks, to quote the master.

The post Pallet Furniture Inspirations: Poland, Wuppertal and other appeared first on Pallet Furniture.
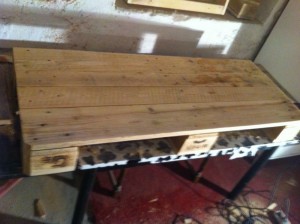


Latest Images